When an LG refrigerator’s freezer stops working, it’s more than an inconvenience, it’s a race against spoiled food and wasted money. The fridge side might still be running normally, but the freezer compartment won’t drop below 15°F, ice cream stays soft, and frost starts building up in odd places. Most freezer failures stem from a handful of common issues that don’t require replacing the entire unit. Many can be diagnosed and fixed without a service call, saving hundreds in repair costs. This guide walks through seven frequent causes of LG freezer failures, how to identify each one, and what steps to take to restore proper freezing.
Table of Contents
ToggleKey Takeaways
- When your LG refrigerator freezer is not working, start by checking the temperature settings, cleaning the condenser coils, and inspecting the door gasket—most issues stem from these common culprits rather than compressor failure.
- The evaporator fan motor and defrost system components are the next points to diagnose if basic checks don’t resolve the problem; test these with a multimeter to determine if replacement is needed.
- Proper airflow is critical—avoid overpacking the freezer, leave 1–2 inches of space around vents, and ensure the door seal is tight to prevent warm air from entering.
- Cleaning condenser coils every 6–12 months and addressing frost buildup on the back wall early can prevent most LG freezer failures from developing into costly repairs.
- Many LG freezer repairs like door gasket replacement, fan motor replacement, and defrost component fixes are DIY-manageable for $50–$350, but refrigerant leaks and compressor work require a licensed technician with EPA certification.
Why Your LG Freezer Stopped Working: Understanding the Problem
LG refrigerators use a shared refrigeration system for both the fridge and freezer compartments. A compressor circulates refrigerant through coils, absorbing heat from the interior and releasing it outside via the condenser coils. Cold air flows from the evaporator in the freezer compartment to the fresh food section through damper vents.
When the freezer stops working but the fridge stays cool, the issue typically lies in airflow, defrost components, or temperature regulation, not the compressor itself. The unit is still running, but cold air isn’t reaching or staying in the freezer.
Key symptoms include:
- Freezer temperature above 10°F even though correct settings
- Frost buildup on the evaporator coils or back wall
- Warm air blowing from vents or no airflow at all
- Control panel errors or unresponsive displays
- Unusual noises like grinding, clicking, or silence where a fan should run
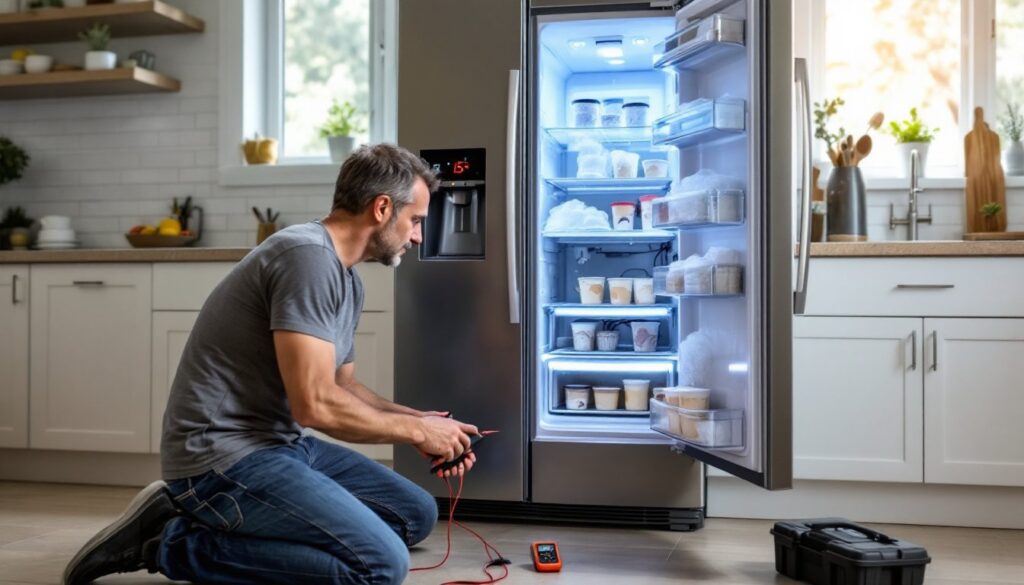
Most LG models have a diagnostic mode accessible through button combinations on the control panel. Consult the user manual for the specific sequence, this can display error codes that pinpoint the fault. Before diving into repairs, unplug the unit or turn off the circuit breaker. Refrigerators carry capacitors that hold charge even when off.
Temperature Settings and Control Panel Issues
The simplest explanation is often the right one. If someone accidentally adjusted the freezer temperature or activated a demo mode, the compressor may run less frequently or not at all.
Check the control panel first. LG freezers should be set between 0°F and 5°F for optimal performance. If the display shows a higher number or is blank, adjust the setting and wait 24 hours to see if temperatures stabilize.
Demo mode is a retail feature that lights up the display without cooling. This mode sometimes activates during power outages or if buttons are pressed in a certain sequence. To exit demo mode on most LG models, press and hold the Refrigerator and Ice Plus buttons (or Freezer and Express Freeze, depending on the model) simultaneously for about 5 seconds until the display beeps and resets. Refer to the specific model manual for exact instructions.
If the control panel is completely unresponsive or displays an error code, the main PCB (printed circuit board) may have failed. Power surges or moisture infiltration can damage the board. Replacing a control board requires unplugging the unit, removing the control panel cover, disconnecting wire harnesses, and installing a new board, typically a $150–$350 part plus labor if a tech is called. This is straightforward but requires ordering the correct model-specific part from LG or an appliance supplier.
Blocked or Dirty Condenser Coils
Condenser coils are located on the back or beneath the refrigerator and release heat from the refrigerant. When coils get clogged with dust, pet hair, and debris, heat exchange efficiency drops. The compressor runs longer and hotter, but the freezer won’t reach target temperatures.
To inspect and clean the coils:
- Unplug the refrigerator or shut off the breaker.
- Pull the unit away from the wall (get help, LG fridges weigh 250–350 lbs).
- Locate the coils, usually a grid of black or copper tubing on the rear panel or behind a kick plate at the base.
- Use a coil brush (a long, narrow brush designed for the job, around $10 at hardware stores) and a vacuum with a brush attachment to remove buildup. Work gently to avoid bending fins or tubing.
- Vacuum the floor and surrounding area to prevent dust from resettling.
Clean condenser coils every 6–12 months depending on household dust and pet activity. In multi-pet homes, quarterly cleaning is advisable.
If coils are clean but the compressor feels excessively hot to the touch or cycles on and off rapidly, the condenser fan motor (on rear-coil models) may have failed. This fan cools the compressor and coils. Replacement involves disconnecting the motor wire harness and unscrewing the motor mount, doable for a confident DIYer but expect to pay $80–$150 for the part.
Evaporator Fan Motor Failure
The evaporator fan circulates cold air throughout the freezer and fridge compartments. It’s located behind the back panel inside the freezer, near the evaporator coils. If this fan stops, cold air sits stagnant in the coils while the freezer warms.
Signs of evaporator fan failure:
- Freezer is warmer than the fridge
- No airflow from vents inside the freezer
- Frost buildup on the back wall but not around food
- A humming or grinding noise, or total silence where a fan should spin
To test the fan:
- Open the freezer door and listen for a soft whirring. On most models, the fan runs when the door is closed: some have a door switch that stops the fan when opened.
- Press the door switch (a small button on the door frame) with the door open, the fan should start.
- If there’s no sound, unplug the unit and remove the evaporator cover panel inside the freezer (typically held by screws along the edges).
- Spin the fan blade by hand. It should rotate freely. If it’s stiff, frozen in ice, or doesn’t spin at all, the motor bearings may be seized or the motor is dead.
- Use a multimeter to test continuity on the motor windings (disconnect the wire harness first). No continuity means the motor needs replacement.
Replacing an evaporator fan motor costs $50–$120 for the part. The job involves removing frozen food, unscrewing the old motor, disconnecting wires, and installing the new one. Allow the freezer to thaw or use a hairdryer on low to melt ice around the fan assembly, never chip ice with tools.
Defrost System Problems
Modern LG refrigerators use an automatic defrost system to prevent ice buildup on the evaporator coils. The system cycles a defrost heater on periodically to melt frost, then drains the water out through a tube. When this system fails, ice accumulates on the coils, blocking airflow and preventing the freezer from cooling.
Common defrost system failures include:
- Defrost heater: Heats the coils to melt ice. If it burns out, frost accumulates. Test with a multimeter for continuity (typically 50–200 ohms). Replacement part: $30–$80.
- Defrost thermostat: Monitors coil temperature and controls when the heater runs. If defective, the heater won’t activate. The thermostat should show continuity when cold (below 20°F) and open when warm. Part cost: $15–$40.
- Defrost timer or control board: Triggers the defrost cycle. On older models, a mechanical timer can be manually advanced. On newer LG units, the main control board handles timing. If the board is faulty, defrost cycles won’t occur.
To inspect the defrost system:
- Unplug the unit and remove the evaporator cover panel.
- Look for heavy frost or ice coating the coils. Light frost is normal: thick ice buildup indicates a defrost failure.
- Locate the defrost heater (a glass or metal tube running below or alongside the coils) and test for continuity.
- Check the defrost thermostat (a small disc with two wires, usually clipped to the coils).
If ice is the issue but components test fine, manually defrost the freezer by unplugging it, removing food, and letting it sit with doors open for 8–12 hours. Place towels to catch meltwater. Restart and monitor. If frost returns quickly, a component has failed.
Door Seal and Air Circulation Issues
A damaged or dirty door gasket allows warm, humid air into the freezer, causing frost buildup and forcing the compressor to overwork. Even a small gap can prevent the freezer from reaching proper temperatures.
Inspect the gasket:
- Run a hand along the door seal with the door closed. Feel for cold air escaping or warm air entering.
- Perform the dollar bill test: close the door on a dollar bill. If it pulls out easily, the seal is weak.
- Look for cracks, tears, or warping in the rubber. Crumbs or spills can also prevent a tight seal, clean the gasket with warm soapy water and dry thoroughly.
Replacing a door gasket costs $60–$150 for the part. Installation is straightforward: loosen the retainer screws around the door perimeter, pull out the old gasket, press the new one into the channel, and re-tighten screws. Start at the top corners and work your way around to prevent wrinkles.
Overpacking is another common airflow issue. LG freezers rely on air circulation around food items. Blocking vents with frozen pizzas or ice bags prevents cold air from reaching all areas. Leave at least 1–2 inches of space around vents (typically on the back wall or sides). Rearrange contents so air can flow freely.
If the freezer has been opened frequently, during a party, for example, it may take 24–48 hours to return to optimal temperature. Minimize door openings and check that the door closes fully after each use.
Conclusion
Most LG refrigerator freezer failures trace back to temperature settings, dirty coils, fan motors, defrost components, or door seals, not catastrophic compressor failure. Start with the simplest checks: temperature settings, condenser coil cleaning, and door gasket inspection. If those don’t solve the issue, move to testing the evaporator fan and defrost system with a multimeter. Many repairs are manageable for DIYers comfortable with basic tools and appliance disassembly. But, if refrigerant leaks, compressor replacement, or complex control board diagnostics are involved, call a licensed appliance technician. Refrigerant work requires EPA certification, and compressor replacement often costs more than a new unit.