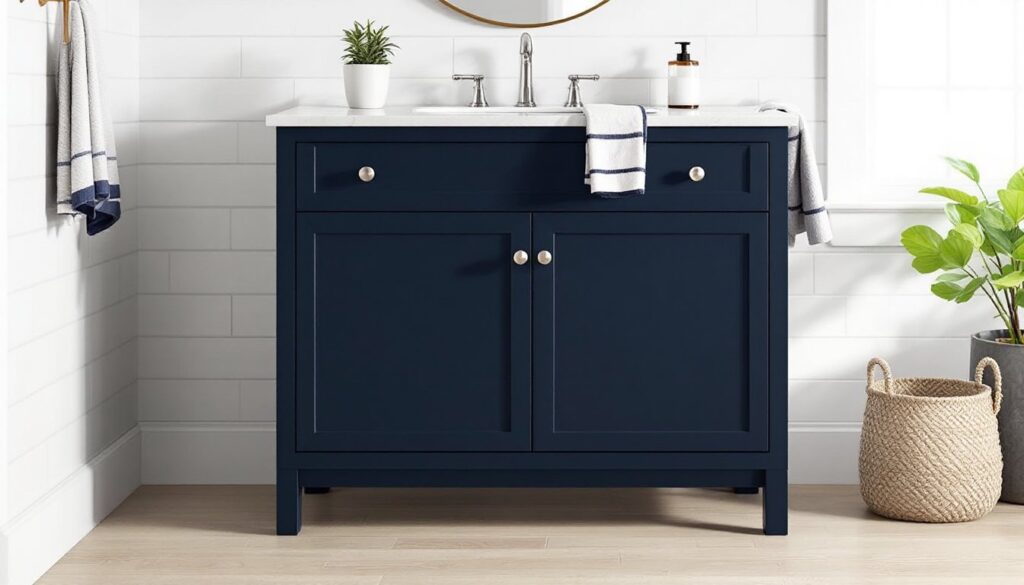
A navy bathroom vanity brings depth and sophistication to any bathroom, whether it’s a powder room refresh or a full master bath remodel. Unlike trendy colors that fade from favor, navy blue sits at the intersection of classic and contemporary, bold enough to make a statement but grounded enough to pair with nearly any design style. It hides water spots better than white, feels warmer than gray, and adds visual weight without darkening a space the way black can. For homeowners looking to elevate their bathroom beyond builder-grade beige, a navy vanity offers a high-impact upgrade that doesn’t require gutting the entire room.
Table of Contents
ToggleKey Takeaways
- A navy bathroom vanity combines timeless design with practical benefits—it conceals water spots and daily wear while pairing effortlessly with any color scheme and design style.
- Proper measurements and configuration (single vs. double sink, 24–72 inches wide, wall-mounted vs. freestanding) are essential before selecting a navy vanity that fits your bathroom footprint and building code requirements.
- Quality materials like solid wood, plywood, or MDF with catalyzed conversion varnish or waterborne urethane finishes ensure your navy vanity resists moisture and warping for long-term durability.
- Navy bathroom vanities work across multiple design styles—from traditional with marble countertops to modern farmhouse with Shaker doors to coastal with white accents—offering versatility that boosts perceived home value.
- Pair your navy vanity with white or warm neutral walls, brass or matte black hardware, and light countertops (white quartz, butcher block, or light wood) to create a cohesive, sophisticated bathroom.
- Proper installation with stud-mounted blocking, silicone caulk application, and routine maintenance (gentle cleaning, caulk inspection, and finish touch-ups) keeps your navy vanity performing beautifully for years.
Why Navy Blue Is the Perfect Choice for Bathroom Vanities
Navy blue works in bathrooms because it’s inherently practical. The darker tone conceals the daily wear that lighter vanities can’t, toothpaste splatters, makeup smudges, and hard water residue blend into the finish rather than screaming for attention. This makes it ideal for busy family bathrooms or powder rooms that see heavy guest traffic.
From a design perspective, navy functions as a neutral with personality. It anchors a room without competing with tile, fixtures, or wall color the way a bright accent cabinet might. Navy pairs effortlessly with both warm and cool tones, which gives homeowners flexibility when selecting countertops, hardware, and lighting.
The color also reads differently depending on lighting conditions. In a bathroom with natural light, navy shows its blue undertones and feels fresh. Under warm artificial light, it leans richer and more dramatic. This adaptability means the vanity can shift mood throughout the day without requiring a single change to the space.
Navy cabinetry adds perceived value. While white vanities have long been the default, darker finishes signal intentional design choices. Real estate agents often note that thoughtfully updated bathrooms, especially those with non-neutral vanities, photograph better and attract more interest than generic spaces.
Choosing the Right Navy Bathroom Vanity for Your Space
Size and Configuration Options
Start by measuring the existing footprint if replacing a vanity, or map out available wall space for a new install. Single-sink vanities typically range from 24 to 48 inches wide, 24- to 30-inch units suit powder rooms and small half baths, while 36- to 48-inch models fit standard full bathrooms. Double-sink vanities run 60 to 72 inches wide and require at least 30 inches of clearance per sink for comfortable use.
Check depth as well. Standard vanity depth is 21 inches, but narrow bathrooms may need an 18-inch unit. Measure from the wall to ensure the vanity won’t block the door swing or crowd the toilet, building codes generally require 15 inches of clearance from the vanity edge to the toilet centerline.
Configuration matters beyond size. Freestanding vanities offer a furniture-like look and easier installation, while wall-mounted models create visual space and simplify floor cleaning. Floating vanities require blocking (solid wood backing) installed between studs during construction or added later if walls aren’t already reinforced, don’t skip this step or the vanity will sag over time.
Material and Finish Considerations
Solid wood (maple, oak, birch) takes paint well and holds up to moisture when properly sealed, but costs more and can warp if the bathroom lacks adequate ventilation. MDF (medium-density fiberboard) with a quality paint finish offers a smooth surface at a lower price point and resists warping better than solid wood, though it doesn’t handle flooding as well if a pipe leaks.
Plywood construction splits the difference, stronger than MDF, more stable than solid wood, and mid-range in price. Avoid particleboard in bathrooms: it swells and crumbles when wet.
Finish type affects durability. Look for catalyzed conversion varnish or waterborne urethane topcoats, these create a hard, moisture-resistant shell that won’t yellow or chip as easily as standard latex paint. Matte and satin finishes hide imperfections better than high-gloss, though gloss is easier to wipe clean.
If buying unfinished or repainting an existing vanity, prep is everything. Sand to 220-grit, apply a stain-blocking primer (especially over raw wood or previous finishes), and use a foam roller for the topcoat to avoid brush marks. Two thin coats beat one thick one.
Design Styles That Complement Navy Vanities
Traditional style pairs navy cabinetry with raised-panel doors, decorative molding, and classic hardware, think antique brass bin pulls or oil-rubbed bronze knobs. Add a marble or quartz countertop in white or cream, and the vanity feels stately without being stuffy.
Modern farmhouse leans on Shaker-style doors (flat panel with simple frame) and mixes metals, matte black faucets with brass or brushed nickel drawer pulls. White subway tile, shiplap, or beadboard on walls keeps the look grounded and approachable. A butcher block or light wood countertop warms the navy and softens the overall palette.
Coastal design uses navy as an anchor (pun intended). Pair it with white or light blue walls, rope mirrors, chrome hardware, and plenty of natural light. Carrara marble or a white quartz countertop with subtle veining reinforces the airy feel. Keep accessories minimal, navy does the heavy lifting here.
Contemporary spaces treat navy as a bold neutral. Choose slab-front doors (no frames or details), integrated handles or push-to-open mechanisms, and a sleek quartz or concrete-look countertop. Pair with geometric tile, frameless mirrors, and matte black or brushed nickel fixtures. The vanity becomes a statement piece rather than blending into the background.
Mid-century modern works surprisingly well with navy. Tapered legs (if going freestanding), horizontal grain wood accents, and brass hardware create a retro-meets-refined vibe. Pair with terrazzo or solid-surface countertops and round mirrors.
Color Pairings and Decor Ideas for Navy Vanities
White walls are the easiest pairing and let the vanity take center stage. This high-contrast combo works in any size bathroom and never feels dated. For less starkness, try warm white or cream, shades like Benjamin Moore’s Swiss Coffee or Sherwin-Williams’ Alabaster soften the edge without losing brightness.
Warm neutrals, greige, taupe, or soft beige, create a cozy envelope around a navy vanity. This works especially well in bathrooms with limited natural light, where cool whites might feel sterile. Pair with brass or gold fixtures to amplify the warmth.
Light blue or seafoam on the walls turns the bathroom tranquil and cohesive. The navy vanity grounds the space and prevents it from feeling too washed out. Use white trim and chrome or nickel finishes to keep it crisp.
Bold accent walls in mustard yellow, coral, or even a deeper teal can share space with navy if balanced carefully. Keep the rest of the room neutral, white or light gray, and use the accent sparingly (one wall, not all four).
Countertop choices matter. White quartz or marble is classic and brightens the vanity. Gray quartz adds sophistication but can feel heavy if walls are also gray, balance it with white or light tile. Butcher block or light wood softens navy and brings warmth, though it requires regular sealing in wet environments.
Hardware and fixtures tie everything together. Brass and gold read warm and traditional. Matte black feels modern and dramatic. Brushed nickel and chrome lean crisp and timeless. Match metals throughout the room (faucet, drawer pulls, towel bars, light fixtures) for a polished look.
Installation and Maintenance Tips
Installation basics: Turn off water supply valves before disconnecting plumbing. If replacing an existing vanity, use a utility knife to score caulk lines along the wall and floor to avoid tearing drywall or damaging tile when pulling the old unit. Check walls for level and plumb before securing a new vanity, shim as needed under the base or behind the back rail.
For wall-mounted vanities, locate studs with a stud finder and install blocking if it’s not already there. Use 3-inch wood screws driven into studs or blocking, drywall anchors alone won’t support the weight of a loaded vanity. Most manufacturers specify mounting height at 32 to 36 inches from the floor to the top of the countertop: adjust based on user height.
Plumbing connections should be straightforward if the new vanity’s sink placement matches the old. If not, you may need to relocate supply lines or the drain, this is easier with PEX supply lines than rigid copper, but drain relocation often requires cutting into walls. If plumbing changes feel over your head, call a licensed plumber. A small service call beats a flooded bathroom.
Apply a bead of caulk along the back edge where the vanity meets the wall and along the sides if it’s flanked by walls or cabinets. Use 100% silicone caulk in a color that matches the vanity or wall, it’s more flexible and water-resistant than acrylic latex.
Daily maintenance: Wipe down the vanity with a damp microfiber cloth. Avoid abrasive cleaners or scouring pads, which can scratch the finish. For stubborn spots, use a pH-neutral cleaner or a drop of dish soap diluted in water. Dry the surface afterward to prevent water spots.
Deep cleaning: Every few months, clean hardware and hinges with a soft cloth. Check caulk lines for mildew or separation and re-caulk as needed. Inspect the cabinet interior for leaks, catching a slow drip early saves the vanity and the subfloor.
If the finish ever chips, touch up with a small brush and matching paint. Sand lightly, prime if exposing raw wood, and apply thin coats. A well-maintained navy vanity will look sharp for years.