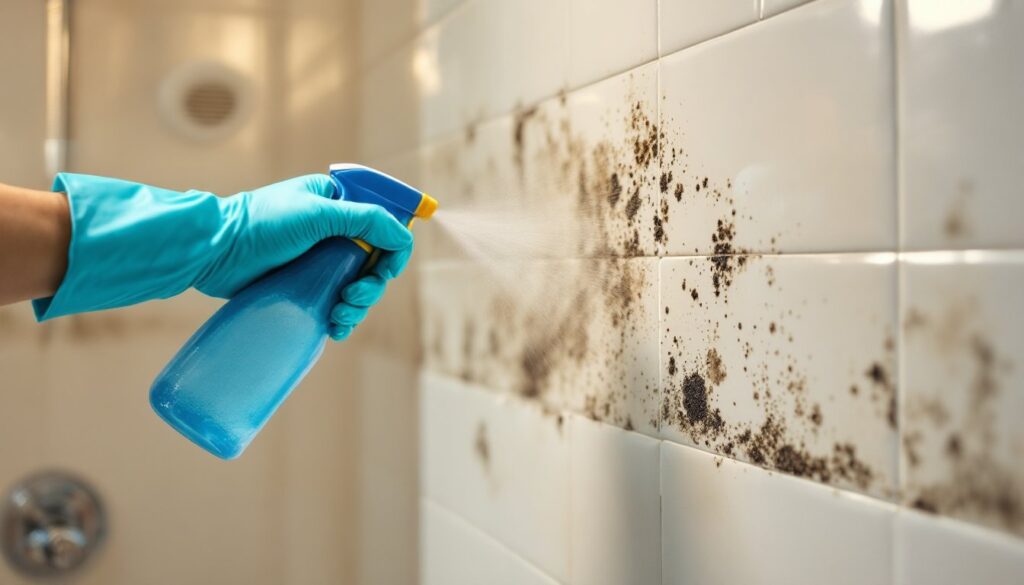
Shower mold isn’t just unsightly, it’s a persistent problem that thrives in the warm, damp environment of bathrooms. Left unchecked, it can spread across grout lines, caulk, and even porous tile surfaces, creating health concerns and making the bathroom look neglected. The good news? With the right mold cleaner and a solid game plan, anyone can tackle this problem head-on. This guide walks through why mold loves showers, what products actually work, and how to keep those black spots from coming back.
Table of Contents
ToggleKey Takeaways
- Shower mold thrives in warm, damp environments but can be effectively tackled with the right mold cleaner for shower surfaces, ranging from bleach-based and hydrogen peroxide options to natural alternatives like vinegar and baking soda.
- The best mold cleaner depends on surface material: bleach and hydrogen peroxide for ceramic tile and glass, penetrating formulas for grout and caulk, and pH-neutral products for natural stone to avoid damage.
- Proper mold removal requires ventilation, dry-brushing loose mold first, applying cleaner generously with 10–15 minutes of dwell time, thorough scrubbing, complete rinsing, and surface drying to prevent regrowth.
- Mold can compromise bathroom integrity by eating away at grout and caulk, potentially leading to structural damage if moisture penetrates behind tile, making prompt treatment essential.
- Preventing mold recurrence requires controlling humidity below 50%, running exhaust fans during and after showers, wiping down surfaces to remove standing water, and sealing or replacing cracked caulk regularly.
- If mold covers more than 10 square feet, keeps returning, or has penetrated drywall, consult a licensed mold remediation specialist to address hidden moisture issues.
Why Mold Grows in Your Shower and Why It’s a Problem
Showers are mold magnets. The combination of high humidity, poor ventilation, and organic residue from soap scum and body oils creates ideal conditions for mold spores to settle and multiply. Most residential bathrooms hover around 70–80% humidity during and after showers, well above the 60% threshold where mold thrives.
Common species include Cladosporium, Penicillium, and Aspergillus, all of which appear as black, green, or gray patches on grout, caulk, and tile surfaces. While surface mold is primarily cosmetic, it can trigger respiratory issues, allergic reactions, and asthma symptoms, especially in children, elderly individuals, or anyone with compromised immune systems.
Beyond health concerns, mold eats away at grout and caulk over time, compromising the waterproof seal that protects walls and subfloors. If moisture penetrates behind tile, it can lead to structural damage, rotted studs, and expensive repairs. That’s why addressing shower mold quickly isn’t just about appearances, it’s about protecting the integrity of the bathroom.
Top Types of Mold Cleaners for Showers
Not all mold cleaners are created equal. Some excel at killing surface mold quickly, while others penetrate deeper or offer safer formulations for households with kids and pets. Here’s a breakdown of the most effective options.
Chemical-Based Mold Removers
Bleach-based cleaners are the workhorses of mold removal. Sodium hypochlorite (household bleach) kills mold on contact and lightens stains on non-porous surfaces like ceramic tile, fiberglass, and glass. A typical dilution is 1 cup bleach per gallon of water. Products like Clorox Tilex Mold & Mildew Remover use this formula in a convenient spray bottle.
Bleach works fast, usually within 5–10 minutes, but it has limitations. It doesn’t penetrate porous materials like grout effectively, meaning it kills surface mold but may not reach deeper growth. It also produces harsh fumes, so proper ventilation and respiratory protection are non-negotiable. Never mix bleach with ammonia or acidic cleaners: the resulting gases are toxic.
Hydrogen peroxide (3–10% concentration) is another chemical option that’s gentler than bleach but still effective. It penetrates porous surfaces better and won’t bleach colored grout. Let it sit for 10–15 minutes before scrubbing.
Quaternary ammonium compounds (quats) are found in many commercial mold sprays. They kill mold and leave a residual antimicrobial layer that helps slow regrowth. Products like Concrobium Mold Control use this chemistry and are low-odor, making them easier to work with in enclosed spaces.
Natural and Eco-Friendly Mold Cleaners
For households avoiding harsh chemicals, white vinegar (5% acetic acid) is a proven alternative. It kills roughly 82% of mold species and is safe on most surfaces. Spray undiluted vinegar directly on moldy areas, let it sit for at least an hour, then scrub and rinse. The smell dissipates as it dries.
Baking soda works as both a mild abrasive and a pH adjuster that inhibits mold. Mix 1 tablespoon per cup of water, spray it on, scrub, and rinse. For stubborn mold, combine baking soda and vinegar, the fizzing action helps lift mold from textured surfaces.
Tea tree oil and grapefruit seed extract are natural fungicides. A solution of 1 teaspoon tea tree oil per cup of water can be sprayed on mold and left without rinsing. These options are pricier and slower-acting but produce no fumes and leave a mild, pleasant scent.
Borax is a naturally occurring mineral that’s effective against mold and doesn’t release fumes. Mix 1 cup borax per gallon of water, apply with a brush, and wipe clean. It leaves a residue that helps prevent regrowth.
How to Choose the Best Mold Cleaner for Your Shower
The right cleaner depends on the surface material, severity of mold, and household safety priorities.
For ceramic tile and glass: Bleach-based or hydrogen peroxide cleaners work fast and handle heavy staining. These non-porous surfaces won’t absorb chemicals, making them ideal candidates for aggressive treatments.
For grout and caulk: Look for penetrating formulas like hydrogen peroxide or oxygen bleach (sodium percarbonate), which break down organic material below the surface. If grout is badly stained or caulk is crumbling, replacement may be necessary, mold that’s embedded won’t fully scrub out.
For natural stone (marble, granite, travertine): Avoid acidic cleaners like vinegar and harsh alkaline products like bleach, which can etch or discolor stone. Use pH-neutral mold cleaners or hydrogen peroxide at lower concentrations (3%).
For fiberglass and acrylic: Stick with non-abrasive cleaners. Baking soda, vinegar, or commercial sprays designed for plastic surfaces won’t scratch finishes.
Safety considerations: In homes with children, pets, or respiratory sensitivities, natural cleaners or low-fume options like Concrobium are smarter choices. If using bleach or strong chemicals, ensure the bathroom door is open, the exhaust fan is running, and no one else is in the space.
Step-by-Step Guide to Removing Mold from Your Shower
Proper mold removal isn’t just about spraying and wiping. Skipping prep or rushing the process leaves spores behind that’ll regrow within weeks.
Materials and tools:
- Mold cleaner (bleach, vinegar, hydrogen peroxide, or commercial spray)
- Stiff-bristle brush or old toothbrush
- Spray bottle (if mixing your own solution)
- Bucket and sponge
- Safety gear: nitrile gloves, safety goggles, N95 respirator (especially with bleach or heavy mold)
- Plastic sheeting or towels to protect fixtures
Step 1: Ventilate the bathroom. Turn on the exhaust fan and open windows if available. If using bleach or strong chemicals, this is critical.
Step 2: Dry-brush loose mold. Use a stiff brush to remove surface mold before applying cleaner. This prevents smearing and helps the cleaner penetrate better. Wipe debris with a damp cloth and discard it in a sealed bag.
Step 3: Apply the mold cleaner generously. Spray or brush it onto all affected areas, grout lines, caulk, tile, and corners. Don’t skimp: the cleaner needs to stay wet to work.
Step 4: Let it dwell. Follow product instructions, but most cleaners need 10–15 minutes of contact time. For stubborn mold, extend this to 30 minutes or reapply if the surface dries.
Step 5: Scrub thoroughly. Use a stiff brush on grout and a softer sponge on tile. Work in small sections and apply firm pressure. An old toothbrush is perfect for tight corners and grout joints.
Step 6: Rinse completely. Use a handheld showerhead or bucket of clean water to flush away cleaner and dead mold. Any residue left behind can attract new growth.
Step 7: Dry the surface. Wipe down walls and fixtures with a clean towel. Run the exhaust fan for at least 30 minutes after cleaning to drop humidity levels.
When to call a pro: If mold covers more than 10 square feet, has penetrated drywall or insulation, or keeps returning even though cleaning, there may be a hidden moisture issue (leaking pipes, failed waterproofing membrane). At that point, a licensed mold remediation specialist should assess the situation.
Preventing Mold from Returning to Your Shower
Cleaning mold is only half the job. Without addressing the root causes, moisture and poor airflow, it’ll be back in weeks.
Control humidity: Run the exhaust fan during every shower and for 20–30 minutes afterward. If the bathroom doesn’t have a fan, crack a window or use a portable dehumidifier. Target humidity should stay below 50%.
Improve ventilation: Upgrade to a more powerful exhaust fan if the current one is weak or loud (which discourages use). Fans are rated in CFM (cubic feet per minute): bathrooms typically need 1 CFM per square foot of floor space. A 50-square-foot bathroom should have at least a 50 CFM fan.
Wipe down surfaces: After each shower, squeegee tile walls and glass doors or wipe them with a towel. Removing standing water eliminates the moisture mold needs to grow.
Seal grout and caulk: Apply a penetrating grout sealer annually to make grout less porous and easier to clean. Replace cracked or moldy caulk with mold-resistant silicone caulk, especially in corners and along the tub or shower pan.
Use mold-resistant products: When remodeling, choose mold-resistant drywall (purple board), paint with mildewcides, and cement backer board behind tile instead of standard drywall.
Regular maintenance: Spray tile and grout with a preventive treatment (diluted vinegar, hydrogen peroxide, or a commercial mold inhibitor) every few weeks. A quick wipe-down beats a deep scrub every time.
Mold in the shower is annoying, but it’s not inevitable. With the right cleaner, consistent effort, and smart prevention, anyone can keep their shower looking clean and their bathroom healthier.